How to Use GPTHumanizer AI: Best Settings, Modes, and Workflow
Summary
It is controlled rewriting that makes the text sound more natural without flattening the original message.
Key Takeaways:
Humanize section by section to reduce voice drift and keep review easier.
Choose Lite, Pro, or Ultra based on how much restructuring the draft actually needs.
Always review the output for meaning, facts, tone, and protected terms before publishing.
Most people get weaker results from GPTHumanizer for one simple reason: they paste in a rough draft, click Humanize once, and expect the tool to do all the thinking. That usually leads to output that sounds smoother but still feels generic, overly even, or slightly off in tone.
A better approach is to treat GPTHumanizer as a controlled editing workflow. You prepare the draft, choose the right mode and writing style, humanize section by section, then review the result before publishing. That is where the strongest results usually come from.
This guide walks through that process step by step so you can get more natural output without losing clarity, meaning, or control.
Why Humanizing Is Not Just About Swapping Words
If you only swap words, the text will usually still sound machine-made. Better humanization comes from changes in sentence structure, pacing, transitions, and paragraph flow.
That is why settings and review matter more than random variation. If the source draft is vague, repetitive, or empty, even a stronger rewrite will still feel thin. GPTHumanizer can improve delivery, but it cannot replace missing substance.
How to Use GPTHumanizer AI Step by Step
Here is the simplest workflow to follow:
Prepare the draft
Protect key terms and details
Choose Lite, Pro, or Ultra
Choose the writing style
Match the workflow to the draft type
Humanize section by section when the piece is longer or voice-sensitive
Review for meaning, tone, readability, and protected terms before publishing
If you follow that order, GPTHumanizer becomes much easier to control and much easier to review.
What to Prepare Before Using GPTHumanizer AI
Before you paste anything into GPTHumanizer, decide what must stay fixed and what is allowed to change. The simplest prep checklist is your goal, your audience, the tone you want to keep, the terms that cannot be rewritten, and any sections that need extra caution.
1) Check the draft quality first
Here is the blunt truth: you cannot humanize emptiness.
If the draft is vague, repetitive, or full of filler, the output may sound smoother but it still will not feel strong. Humanizers can reshape language, but they cannot add missing expertise, real examples, or a clear point of view.
A better starting draft usually has:
a clear point or stance
specific constraints
real examples, details, or useful framing
If you read 200 words and feel like you learned nothing, fix the draft first. Then humanize it.
2) Set a protection list
Before rewriting, decide what should stay exactly the same.
Must stay the same:
product names and brand wording
numbers, dates, and statistics
quotes and citations
links
terms with fixed meaning
Allowed to change:
sentence structure
transitions
paragraph flow
word choice, as long as the meaning stays intact
3) Mark higher-risk lines for extra review
Some lines should always be reviewed more carefully after rewriting, especially:
direct quotes
legal or policy language
medical or technical claims
compliance statements
any sentence where one word could change the meaning
If you want a deeper prep checklist, read What to Prepare Before Using GPTHumanizer AI on Any Draft.
Humanize Section by Section, Not All at Once
A common mistake is pasting a full long article into GPTHumanizer in one pass. That usually makes review harder and increases the chances of voice drift, lost details, or repeated phrasing.
For most drafts, section-by-section processing works better. Break the draft into logical parts such as the intro, each body section, and the conclusion. This gives you better local control over tone, pacing, and meaning.
It also makes editing easier later. If one section comes out too stiff, too polished, or slightly off in tone, you can fix that section without disturbing the rest of the piece.
This approach is especially helpful for long-form articles, brand-led content, and drafts with important terminology. If your main problem is voice drift across a longer piece, this is usually the safest workflow to start with. It also works better for blog posts that need to keep a recognizable brand voice instead of sounding flattened by one aggressive full-pass rewrite.
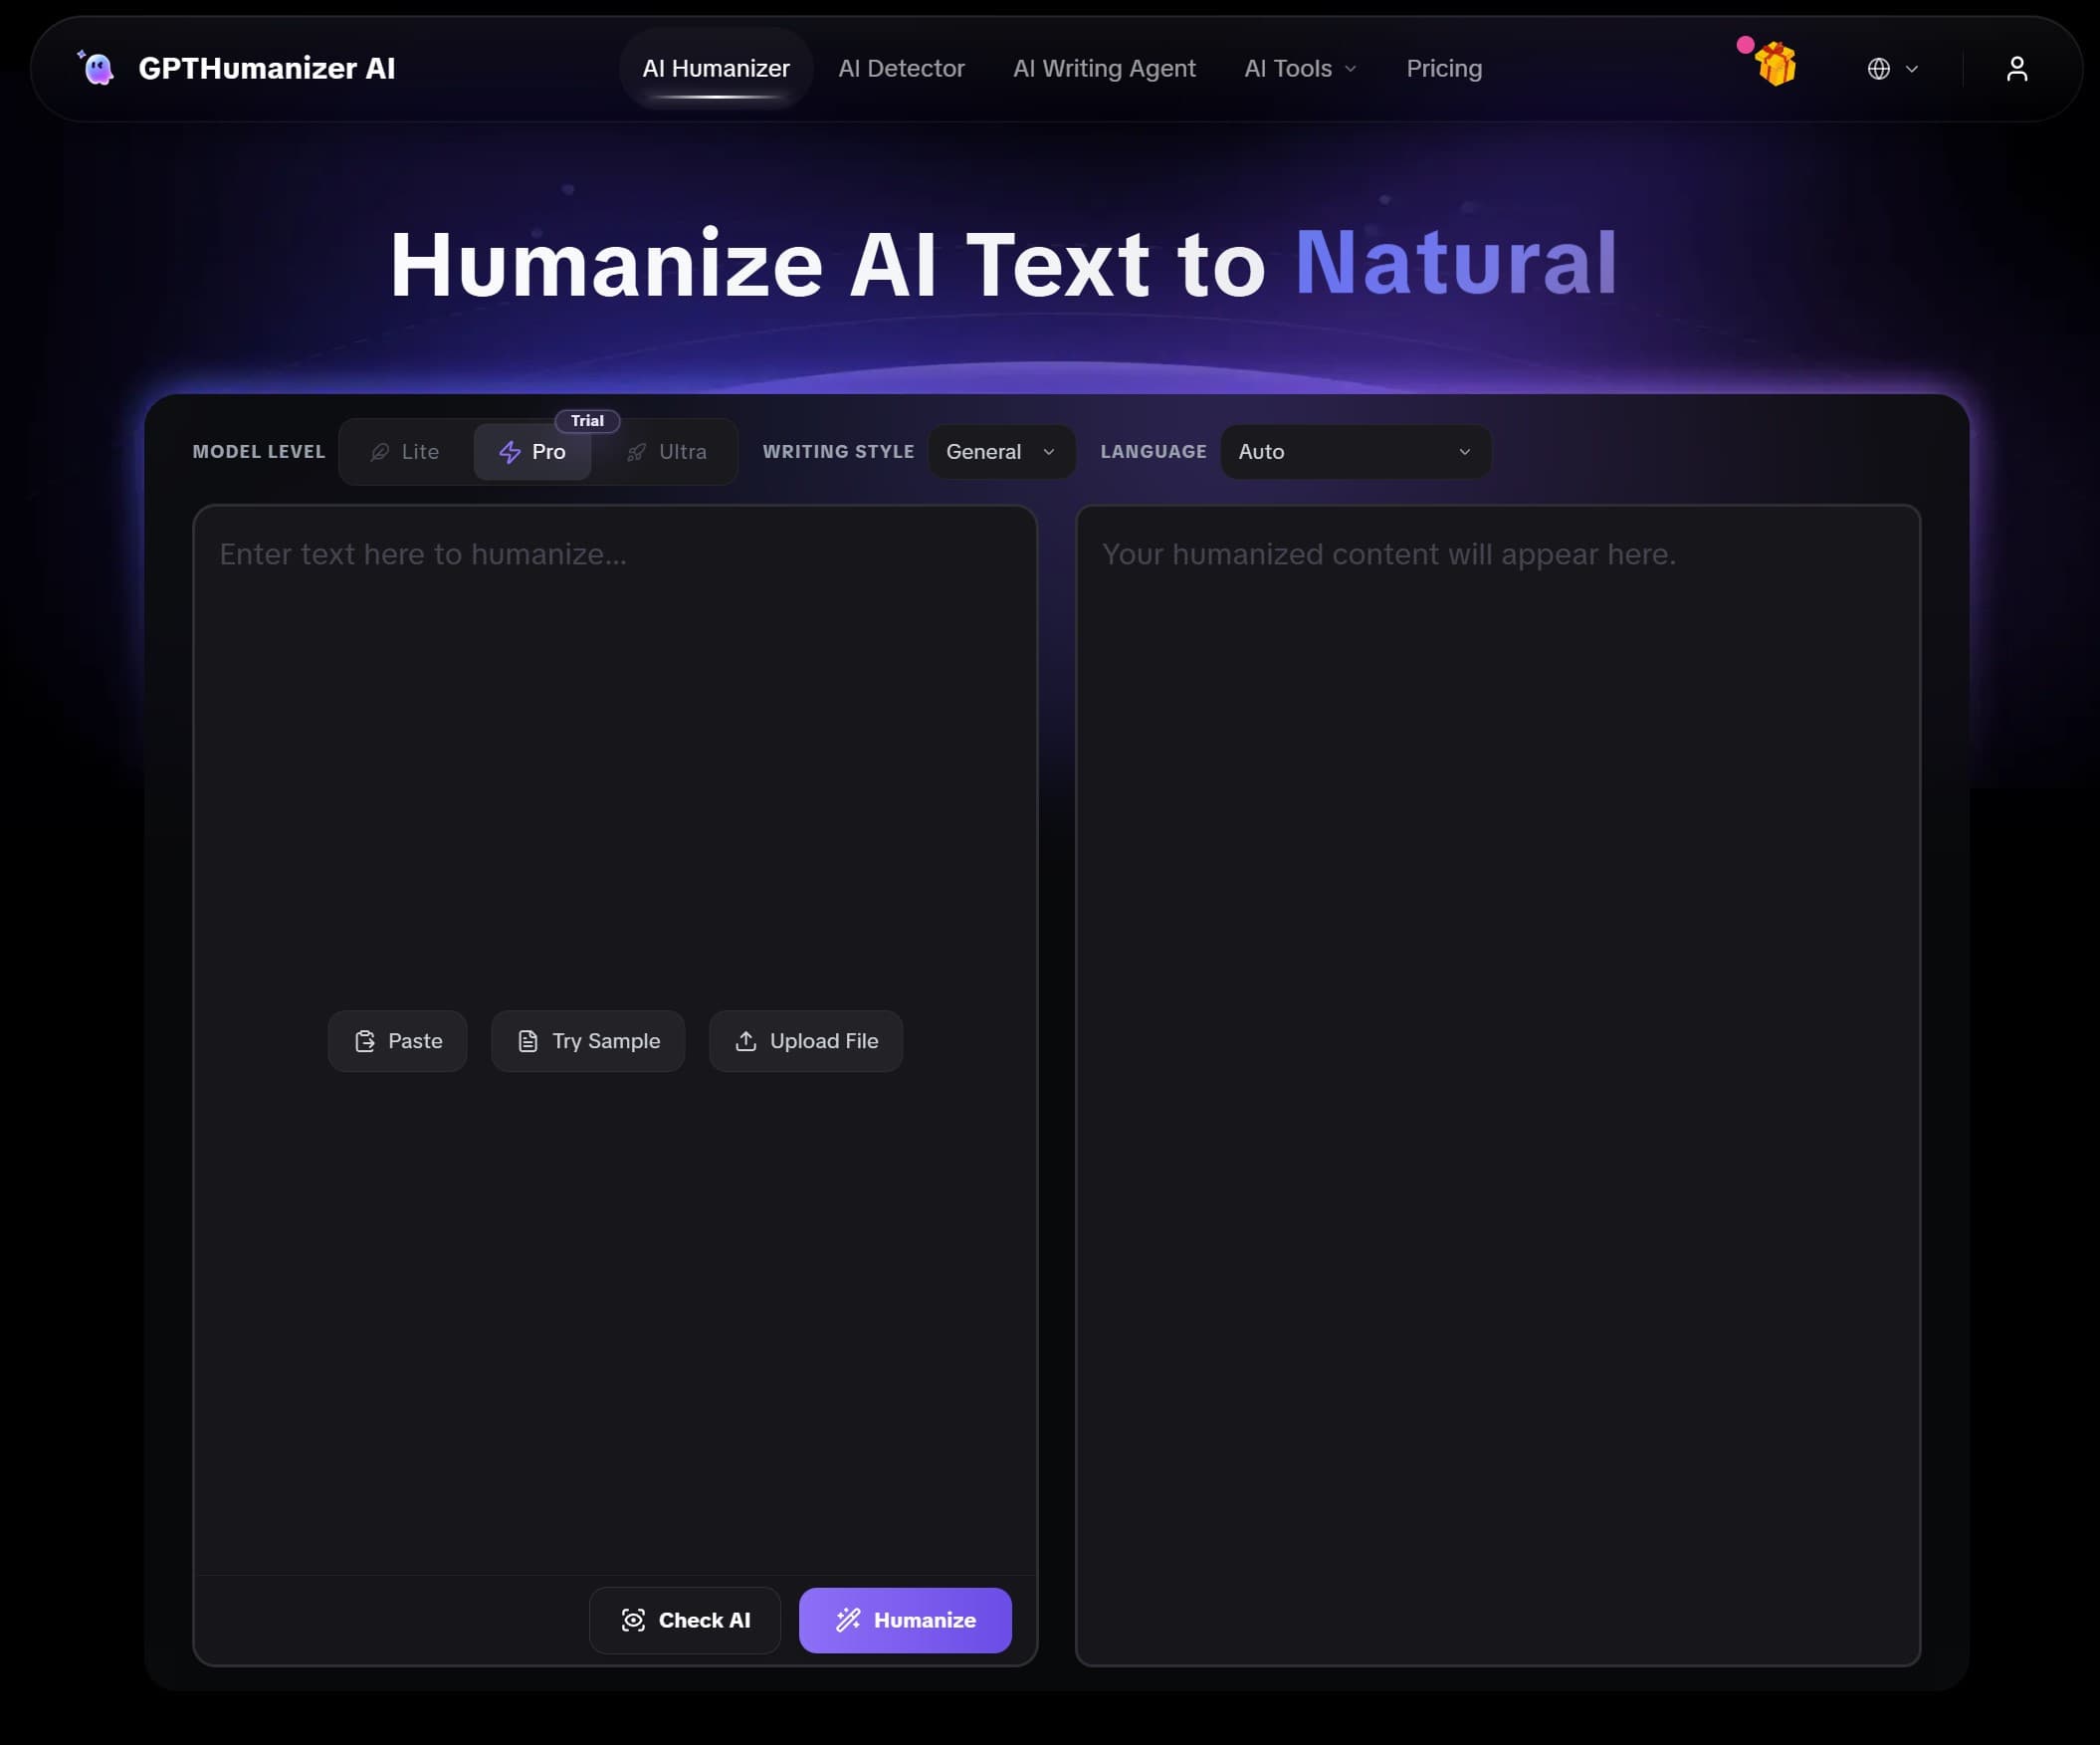
How to Choose Lite, Pro, or Ultra
GPTHumanizer offers multiple model strengths, and the best choice depends on how much restructuring the draft actually needs.
Lite
Use Lite when the draft is already clear and you mainly want cleaner flow, smoother phrasing, and lighter polish. It is a good choice when you do not want heavy rewriting.
Pro
Pro is the best default for most blog drafts, marketing pages, website copy, and standard professional writing. It usually gives the best balance between naturalness and control.
Ultra
Use Ultra when the ideas are right but the wording feels too patterned, too flat, or not natural enough for the final context. Because it makes stronger structural changes, it also needs closer review.
Best rule
Start lighter, then move up only if the section still sounds too stiff or repetitive. That usually gives you better control than starting with the strongest setting right away.
If you want a broader product overview, read the full GPTHumanizer review.
How to Choose the Right Writing Style
Writing style should match the final publishing channel, not just the source draft. In most cases, the closer the style is to the real output format, the more natural the result will feel.
Writing Style | Best Fit |
|---|---|
General | Everyday communication, standard articles, and general-purpose writing |
Academic | Formal, evidence-led writing with a more structured tone |
Blog | Conversational articles, blog posts, and SEO-friendly content |
Casual | Informal updates, lighter personal content, and social-style writing |
Direct professional communication with minimal fluff | |
Business | Reports, workplace communication, and formal business writing |
Scientific | Research-heavy writing with a more evidence-first structure |
Technical | Manuals, product specs, and terminology-heavy content |
In practice, this usually means Blog for articles and many SEO refresh drafts, Email for direct professional communication, and Casual for lighter social captions or short-form content where stiffness becomes obvious fast. If the draft has fixed terminology, brand wording, or a strong house style, matching the channel is only the first step. You also need a workflow that protects voice, meaning, and useful detail while the text becomes easier to read. That usually works better than choosing based on how the source draft currently sounds.
If you want a deeper breakdown, read which GPTHumanizer writing style should you choose: a practical guide.
Different Drafts Need Different Workflows
Not every draft should be handled the same way. Blog posts usually need voice control more than maximum rewriting. SEO content refresh work needs stronger protection for entities, headings, and original intent. Emails, LinkedIn posts, and other short-form drafts need tighter sentence control because over-editing becomes obvious fast. Long-form articles need section-by-section handling to reduce voice drift. Drafts focused on readability need cleanup without flattening nuance, and terminology-heavy drafts need a stronger protection list plus a closer final review.
The best workflow depends less on the tool itself and more on what the draft cannot afford to lose. That is why mode, style, chunking, and review should be adjusted to the task, not reused mechanically from one type of writing to another.
If you want a deeper walkthrough, start with the guides on choosing the right workflow for different writing tasks, using GPTHumanizer for blog posts without losing brand voice, handling SEO content refresh work, working on long-form articles without voice drift, improving readability without over-simplifying, and editing emails, LinkedIn posts, or other short-form content.
Use Built-In Writing Feedback as a Review Tool, Not a Finish Line
Once GPTHumanizer generates the rewrite, use the built-in writing feedback to spot lines that still feel too uniform, overly polished, or slightly mechanical.
The most useful way to treat built-in writing feedback is not as a score to chase. It works better as a review aid that helps you find weak sentences faster.
A simple review loop
Run Humanize.
Review the sentences that need a closer manual check.
Pull out the weakest 3 to 5 lines, usually intros, transitions, or generic mini-summaries, and revise them for clarity, specificity, and rhythm.
Edit those lines by changing structure, adding a real constraint, or varying the pacing.
Do a final review after those edits to confirm the meaning, tone, and details still hold.
Small targeted fixes usually work better than repeatedly rerunning the whole section.
What to Do If the Output Still Sounds Too Stiff or Uniform
If the output still feels too even or too polished, do not rerun the whole draft right away.
First, fix the lines that feel too generic, too even in rhythm, or too predictable, especially intros, transitions, mini-summaries, and generic conclusions. These are often the sections where the rhythm feels too predictable.
The easiest fixes are usually:
change the sentence shape
add a real constraint or concrete detail
shorten one sentence and lengthen the next
replace vague summary language with a more specific point
If the rewrite becomes clearer but also flatter, restore one concrete detail, one real constraint, or one sharper point of view. If the text becomes easier to read but starts losing nuance, bring back the qualifiers, terminology, or sentence logic that carried the original meaning. The goal is not just smoother phrasing. It is better readability without oversimplifying the message.
How to Review GPTHumanizer Output Before Publishing
Humanized output still needs a final review before publishing. The goal is not just to catch grammar issues. It is to make sure the message still means the same thing, the tone still fits the channel, and important details have not shifted during rewriting.
Here is a simple final-review checklist:
Meaning: Did any claim become stronger, weaker, broader, or narrower by accident?
Facts: Are names, dates, numbers, and references still correct?
Protected Terms: Did any fixed terms, links, or wording change when they should not have?
Tone: Does the text still sound right for the audience and publishing channel?
Structure: Does each paragraph still have one clear job?
Pacing: Do any sections feel too flat, too polished, or too repetitive?
Brand Voice: If this is a blog or brand-led piece, does it still sound like your normal publishing voice, or did the rewrite make it too generic?
Readability vs. Nuance: Is the text easier to read without flattening useful detail, caveats, or technical meaning?
This step matters more than many people think. The strongest GPTHumanizer workflows are not just about generation. They are about generation plus review.
If you want a more detailed checklist, read How to Review GPTHumanizer Output Before Publishing. If your main concern is meaning drift, pair this step with How to Use GPTHumanizer Without Changing the Original Meaning.
Final Workflow
GPTHumanizer works best as a controlled editing workflow: prepare the draft, protect important details, choose the right model and writing style, humanize section by section, then review the result before publishing.
The strongest results usually come from lighter, more intentional edits rather than repeated full rewrites. The goal is not to force every sentence to look different. It is to make the writing sound more natural while keeping the original message clear and intact.
If you want to go deeper, start with the related guides on writing styles, draft preparation, workflow choice, long-form handling, and final review. If you are ready to test the process yourself, try GPTHumanizer on a short section first and refine from there.
FAQ
Q: How do you use GPTHumanizer AI step by step?
A: Start with a clear draft, protect key terms and details, choose the right model and writing style, humanize section by section, then review the output for meaning, tone, and factual accuracy.
Q: Which GPTHumanizer mode should I choose?
A: Use Lite for lighter cleanup, Pro for most standard drafts, and Ultra when the wording needs deeper restructuring. Start lighter first, then increase strength only if needed.
Q: Which writing style should I choose in GPTHumanizer?
A: Choose the style that matches the final publishing channel. Blog, Email, Business, Academic, and Technical settings each work best when they match the real use case.
Q: Should I humanize a full article at once?
A: Usually no. For better control and easier review, longer drafts are safer to process section by section.
Q: What should I do if the output still sounds too stiff or too uniform?
A: Fix the weakest lines first, especially intros, transitions, and generic summaries. Small targeted edits usually work better than rerunning the entire draft.
Q: How should I review GPTHumanizer output before publishing?
A: Check meaning, facts, names, protected terms, tone, and paragraph flow. Humanized text should still be reviewed manually before it goes live.
Q: How do I use GPTHumanizer for blog posts without losing brand voice?
A: Start with the style closest to the real publishing channel, protect fixed terms and brand wording, humanize section by section, and review the result for tone drift before publishing.
Q: How should I use GPTHumanizer for SEO content refresh work?
A: Use lighter rewriting, protect entities, headings, key terms, and original intent, then review each section to make sure the page becomes clearer without losing structure or meaning.

Related Articles

Does StealthWriter Pass GPTZero and Turnitin? Real Test Expectations in 2026
Does StealthWriter pass GPTZero and Turnitin? Learn why StealthWriter’s built-in human score may not...
HIX Bypass Pricing Explained: Is It Worth Paying For in 2026?
A practical look at HIX Bypass pricing, paid-plan value, word limits, refund terms, and whether it i...
I Tested 7 Paid AI Humanizers: Which Ones Are Actually Worth Paying For?
I tested 7 paid AI humanizers to see which tools are worth paying for, which need more testing, and ...

Does Hixbypas Work in 2026? Fast, and Aggressive Modes Tested
Does Hixbypas, or HIX Bypass, actually work? I tested Fast and Aggressive modes to compare rewrite q...